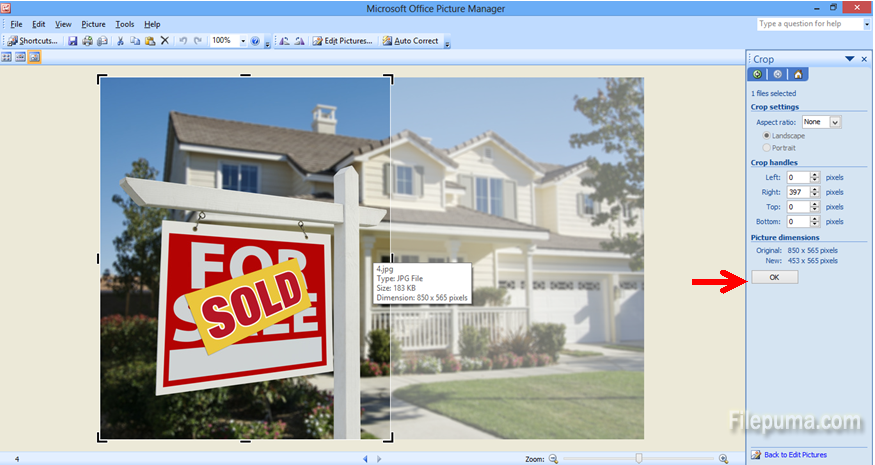
If you want to use just a part of your photo, you don’t need any professional tools. You can easily crop and adjust the photo using Microsoft Office Picture Manager.
Here is how to cut out the unwanted part of your photo:
Step One: Open your picture in Microsoft Office Picture manager:

Step Two: Click on “Edit Pictures…”. An additional pane will appear on the right-hand side:

Step Three: Select “Crop” from the pane on the right-hand side:

Step Four: In the right side pane, you can see pixel value numbers which you can input, if you know the exact dimensions to which you want to crop your photo:

Step Five: Alternatively, you can just drag the four black corners and the mid-side markers until you achieve the desired cropped look of your photo:

Step Six: Lastly, click “OK” on the right side pane:

Step Seven: Your cropped photo is ready, don’t forget to save it!

How to crop a photo /cut out a portion of your photo without PhotoShop? 41

Leave a Reply