If you want to use more of your page when printing a document, you may consider making the margins smaller so you can fit more content on one page. Likewise, if you think you need to bind your document in a folder, you may want to leave wider space around to text for allow for punching or glue-binding. With Microsoft Word you have the option to customize the margins (this is the empty border left between your text and the edges of the sheet of paper on all sides).
Here is how to increase or decrease the margins in Microsoft Word:
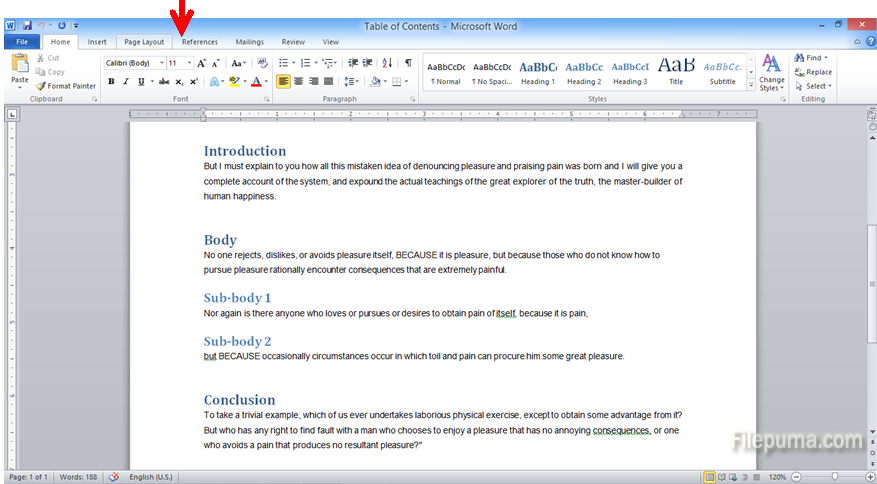
Step One: Open your document in MS Word. By default, there are white margins on the sides and on the top and bottom of your text:

Step Two: Click on the menu “Page Layout”:

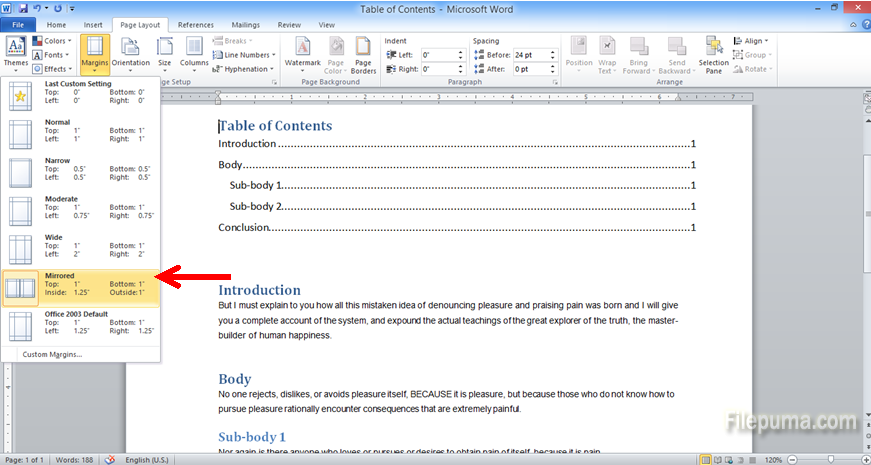
Step Three: Select “Margins” button and a dropdown menu will show:

Step Four: The last row shows the default Microsoft office margins of the document. You can make your own custom borders around the page, or you can select between several ready-made sets: normal, narrow, Moderate, Wide or mirrored margins for your pages:

The document above demonstrates the “Mirrored” option for document margins, which is useful for booklet making or other type of binding. Notice that this ready-made set of margins is asymmetrical, with bigger margin on the left compared to the right side.

Leave a Reply