Microsoft Word is a very useful program which allows you to add a title and subtitles to your article. This can help your readers understand the main themes quickly and accurately. You could add titles to a Microsoft Word document with the automatic Styles tool or by manually formatting text with the Font tool. Here is the function to tell you how to add titles in Microsoft Word.
(1). With the Styles Tool
1. Start Microsoft Word, and then open the document you want to edit from “Open”.
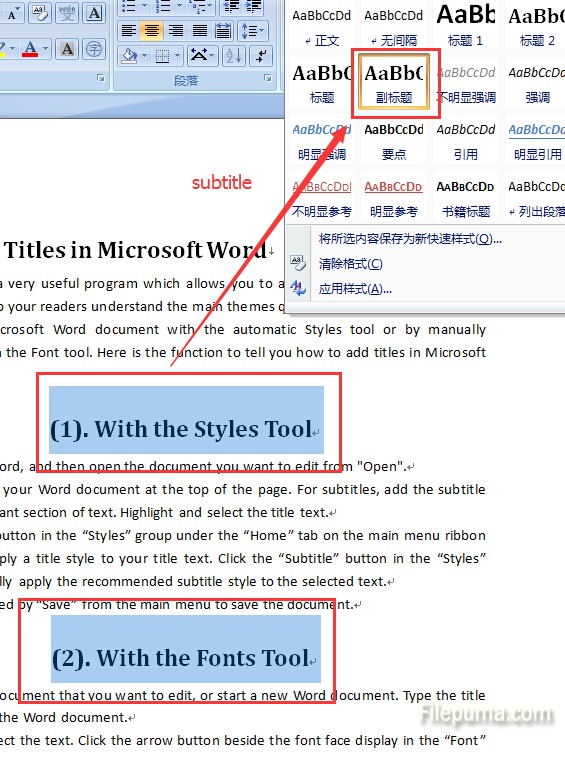
2. Type the title and subtitles text in the right place. Select the title text.
3. Click the “Title” button in the “Styles” group to apply a title style. Click the “Subtitle” button in the “Styles” group to apply the subtitle style.


 4. Click “File” followed by “Save” from the main menu to save the document.
![]()
(2). With the Fonts Tool
1. Start Microsoft Word, and then open the document you want to edit from “Open”.
2. Type the title or subtitle text into the Word document. Highlight and select the text.
3. Go to “Font” group under the “Home” tab to open a list of all available font faces. Choose your favorite font face to apply the font to the title text. And then select your preferred font size from the drop-down list.


3. Click the “B” button to apply a bold font style. Italicize the text by clicking the “I” button, or underline it with the “U” button. You could also choose the color of your titles by clicking the “A” icon.
![]()
4. Save your settings by clicking “Ctrl+S”.
Leave a Reply