One of Photoshop’s most handy tools is the Clipping Mask. Buried in the complicated program’s layers, you can use this tool to create a frame for an image, revealing only the part of the image you want to display.
This can be a great way to crop an image in your Photoshop project without cropping the actual image.
The first step is to create the shape of your choice. The easiest way to do this is by using Photoshop’s Shapes tool which is found in the Tools bar on the left. You can choose from a rectangle, ellipse, rounded rectangle, polygon, or create a custom shape.

For the purposes of this tutorial, we’ll be using an ellipse. After selecting the shape, you can draw the shape one of two ways. You can either drag the cursor across the canvas to create the ellipse.
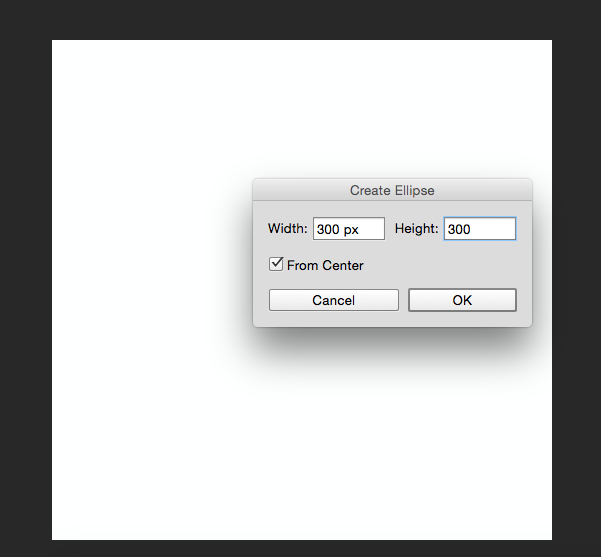
Holding down shift will allow you to create a perfect circle when using the ellipse, or perfect square when using the rectangle. Alternatively, you could just click anywhere on the canvas and type in the exact dimensions of the shape you want to create.

I’ve chosen to create a black circle so it’s easy to see on the canvas. The color is only important in so far as you can see the shape as it will be completely covered by the image.

Next you’re going to want to insert the image you want framed by that shape. To do so go to File > Place Embedded, and navigate to where the file is saved on your computer.
Doing it this way, rather than copying and pasting, allows you to manipulate the image in Photoshop without making irreversible changes to the original file.

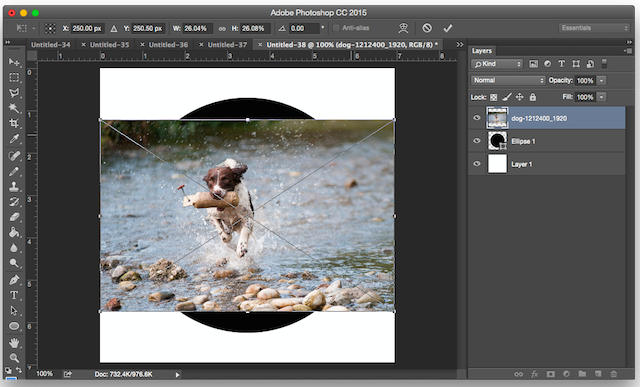
I’m using this image from Pixabay, which I downloaded at 1920×1524. After navigating to it on my computer, it will look like this when you open it in Photoshop. Just hit Enter and it will create a new layer on your canvas.

You’ll notice that it restricted the size of the image to the boundaries of my 500 pixel wide canvas even though it’s a larger image. To ensure that the image will take up all of the circle, right-click it, and select “Free Transform”.

You’ll see the same diagonal lines across the image. Dragging the image from one corner, while holding down the shift key to preserve aspect ratio, enlarge the image until it’s covering the circle.
Then going to your Layers panel, right click on the image layer of the dog and click “Create clipping mask”.

At that point you will see the borders of the image are restricted to the circle shape. You can move your shape around, make it bigger or smaller with the Free Transform tool, and show only the precise part of the image you want displayed.


Leave a Reply