Losing important files can be a frustrating and stressful experience. Whether due to accidental deletion, system crashes, or malware attacks, data loss can happen to anyone at any time. Fortunately, there are powerful tools available to help you recover lost files. One such tool is Glarysoft File Recovery. Now, we will explore how to recover lost files using Glarysoft File Recovery, detailing each step of the process and providing useful tips to maximize your chances of successful recovery.
Glarysoft File Recovery is a user-friendly and efficient software designed to help users recover lost or deleted files from various storage devices. It supports a wide range of file types, including documents, photos, videos, and emails, and can recover files from hard drives, USB drives, memory cards, and other storage media. The software is compatible with Windows operating systems and offers a straightforward interface, making it accessible even to those with limited technical expertise.
- Simple and easy-to-use user interface: Even computer novices can easily get started.
- Supports a variety of file formats: including pictures, documents, videos, audio, compressed files, etc.
- Deep scan function: It can deeply scan storage devices to recover more files that were deleted by mistake.
- File preview function: You can preview the file content before recovery to ensure that the required files are recovered.
Now that we have a good understanding of Glarysoft File Recovery and its features, let’s walk through the step-by-step process of recovering lost files.
- Download and Install Glarysoft File Recovery
- Please visit the Glarysoft official website or Filepuma.
- Click the “Download” button to download the installer file.
- Once the download is complete, open the installer file and follow the on-screen instructions to install the software.
2. Launch Glarysoft File Recovery
Open the application: After installation, launch Glarysoft File Recovery by double-clicking its icon on the desktop or finding it in the Start menu.
3. Start the Scan
Initiate the scan: Click the “Scan” button to begin the scanning process. The software will start looking for recoverable files on the selected drive.
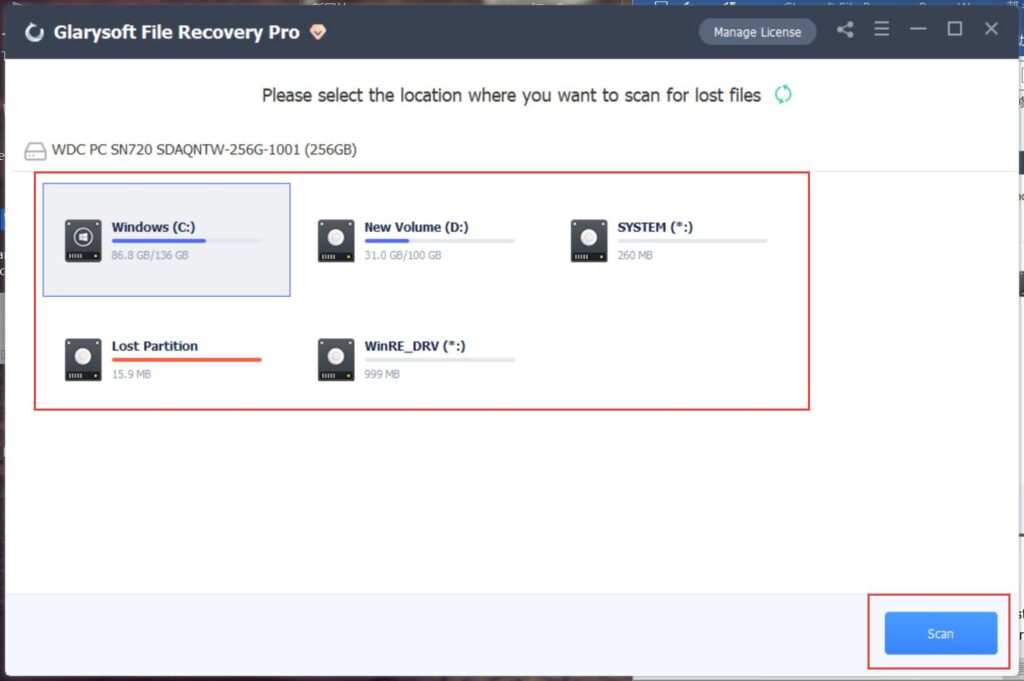
- Select the hard disk where the lost data was stored. The software supports scanning FAT, NTFS, and NTFS+EFS file systems.
- Click “Scan” to initiate a full scan of the selected location. The scanning process usually takes a few minutes to complete. However, if there are many large files, it may require more time.
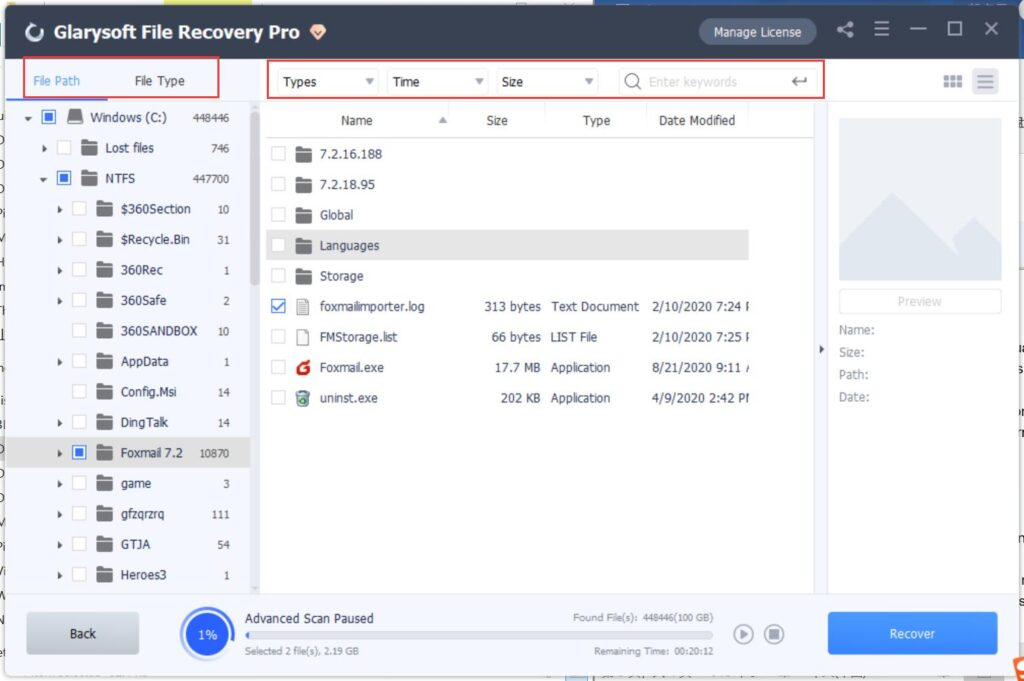
- Once the scan results appear, you can use the left panel to filter the files based on Name, Type, Size, Date Modified, File Path, or File Type to narrow down the results.
4. Preview and Restore
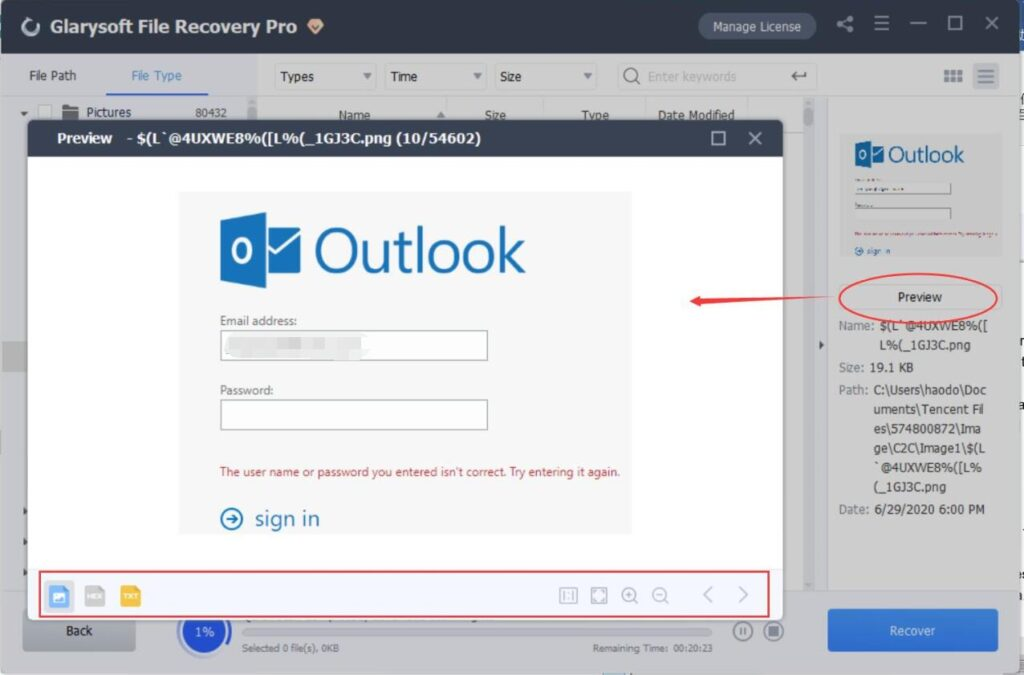
- Glarysoft File Recovery allows you to select and preview the target file. You can switch between different preview formats or zoom in on the preview.
- After previewing the files and confirming their validity, select the files you want to restore. Click the “Recover” button to retrieve the lost data. Choose a location to save the recovered files and complete the process.
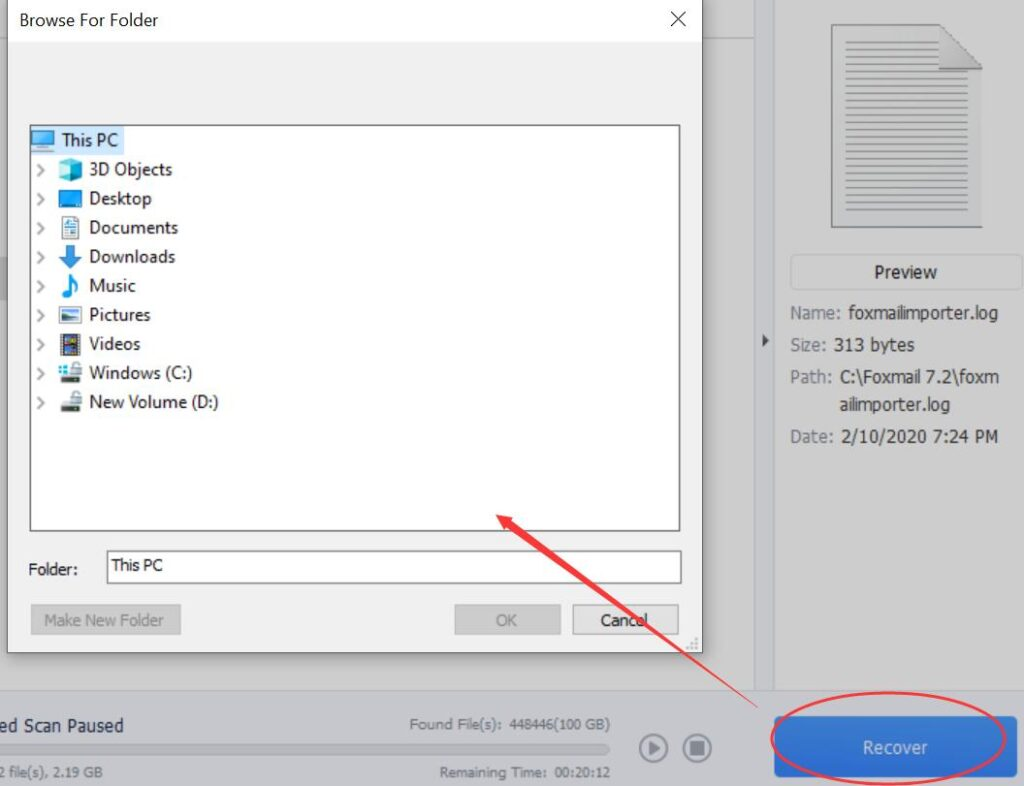
- View Recovery: Click to jump to the location where the recovered files are saved.

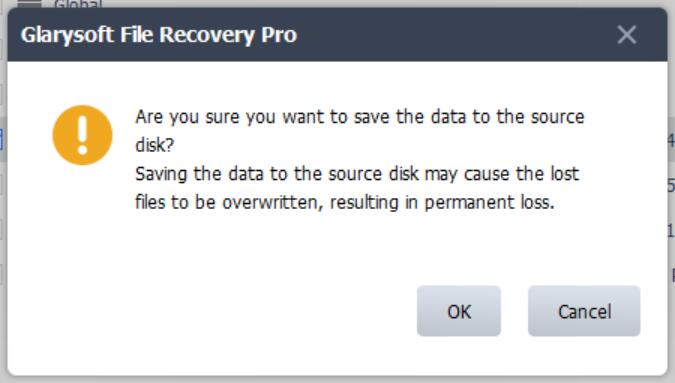
Tips: To avoid overwriting the data, please do not save the recovered files to the same location. Take note of the warning message:
5. Verify Recovered Files
Check the files: Once the recovery is complete, navigate to the folder where you saved the recovered files and verify that they are intact and usable.
6. Tips for Successful Recovery
- Avoid using the drive: To increase the chances of successful recovery, avoid using the drive from which you want to recover files until after the recovery process.
- Act quickly: The sooner you attempt to recover lost files, the better the chances of successful recovery.
- Backup regularly: To prevent future data loss, regularly back up important files.
- By following these steps, you should be able to recover lost or deleted files using Glarysoft File Recovery.
Losing important files can be a daunting experience, but with the right tools and techniques, recovery is often possible. Glarysoft File Recovery provides a reliable and user-friendly solution for recovering lost or deleted files from various storage devices. By following the step-by-step guide outlined in this article, hope you can effectively recover your lost files and minimize the impact of data loss.