Photoshop is one of the most powerful tools in the digital imaging world, offering a wide range of features for editing and enhancing photos. One of the most common tasks that photographers, designers, and content creators often face is resizing multiple images at once. This process can be tedious when done manually, especially when dealing with large batches of photos. Fortunately, Photoshop allows users to automate the resizing process, saving valuable time and effort. In this review, we’ll explore how to batch resize images in Photoshop, discussing the steps, features, and tips to make the process efficient.
Batch resizing is essential for several reasons. If you’re working with a large collection of images, manually resizing each photo is impractical. Whether you’re preparing images for a website, social media, email, or print, resizing images in bulk helps maintain consistency in dimensions and file size. Moreover, it ensures that your images are optimized for their intended use, enhancing loading times for websites and meeting the specific requirements for printing.
Steps to Batch Resize Images in Photoshop
The batch resizing feature in Photoshop is highly efficient, allowing you to resize multiple images simultaneously by recording an action and using the Batch Processing tool. Here’s a detailed step-by-step guide to batch resize your images:
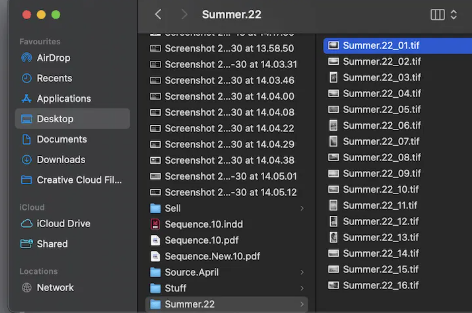
Step 1: Prepare Your Images
Start by gathering all the images you want to resize into a single folder. This will make it easier for Photoshop to locate them when you run the batch process.
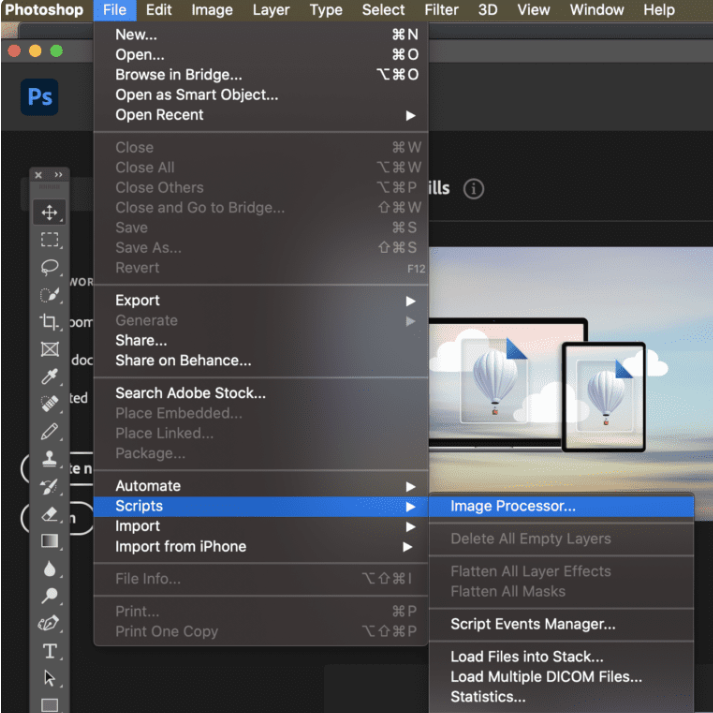
Step 2: Use Image Processor to Batch Resize Images
- Open Photoshop: Launch Photoshop and open the images you want to process, or have them ready in a folder.
2. Find the Image Processor:
- Go to File > Scripts > Image Processor.
- This will open the Image Processor dialog box where you can set your batch processing options.
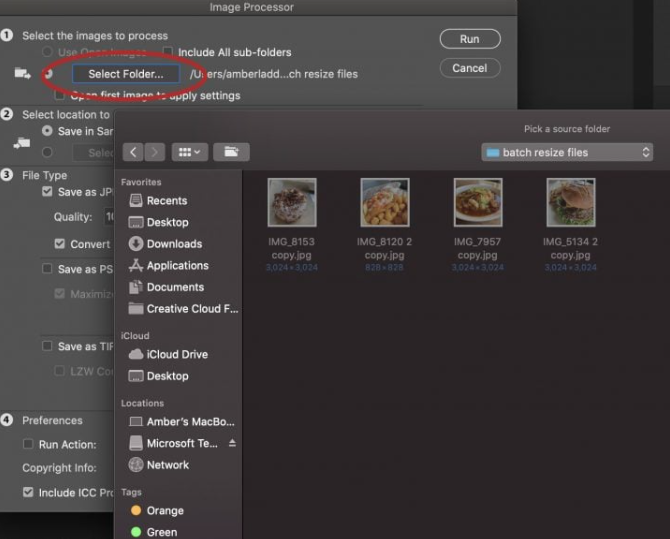
3. Select Folder of Images:
- Choose the folder of images you want to batch edit, or use the Open option if the images are already open in Photoshop.
4. Choose Destination:
- Decide where the processed images will be saved (e.g., same location, a different folder, or a new folder).
5. Select File Type & Settings:
- You can choose the output file type (JPEG, PSD, TIFF) and adjust settings such as quality or compression.
6. Resize Options (optional):
- If you want to resize the images, check the Resize to Fit box and input the desired dimensions.
7. Apply Basic Edits:
- You can also apply some basic edits like converting to grayscale, adjusting quality, or running an action if you have one set up.
Once you’ve set everything up, click Run, and Photoshop will automatically process all the images in the folder according to your settings. This is a great tool for batch editing or organizing a large number of images quickly!
Step 3: Where to Save the Resized Files
- Save in Same Location: This will store the resized files in the same folder as the original files. Photoshop will create a new subfolder within the original location to organize the resized images. If there is already a subfolder with the same name, Photoshop will automatically add a number to differentiate the new one (e.g., “Resized Files 1,” “Resized Files 2,” etc.).
- Save to a New Location: If you prefer to store the resized files somewhere else entirely, you can choose a new folder to save them in. This helps keep your original folder separate from the resized files.
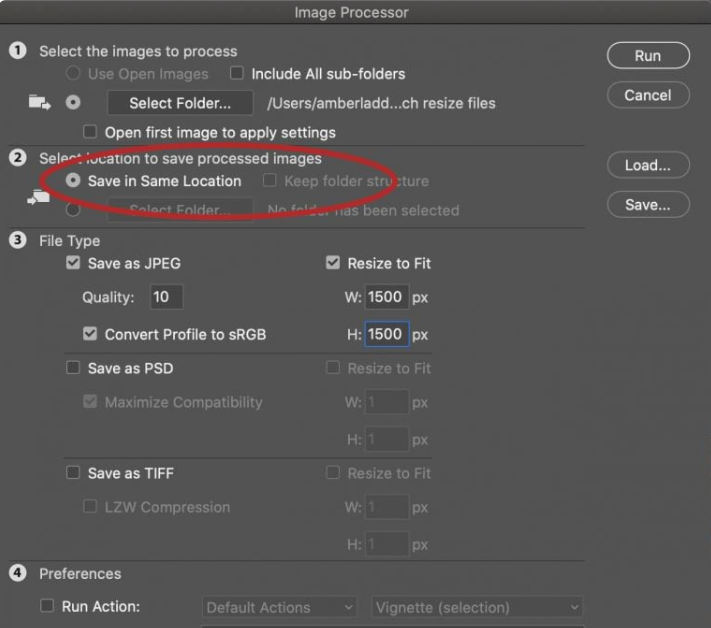
Choosing “Save in Same Location” is useful if you want to keep everything organized in one place, with Photoshop handling folder naming and versioning automatically.
Step 4: Determine the File Type
- Choose the Output File Type: You can select between JPEG, PSD, or TIFF formats, depending on the level of editing and quality you want.
- JPEG Resizing:
- Quality Method: A quick and rough method that uses a number scale from 1 to 10. This is useful for resizing without a precise target size in mind.
- Resize to Fit: A more detailed approach where you enter specific pixel dimensions (width and height). The image will adjust based on the smallest dimension, ensuring it retains its aspect ratio without distortion.
- Other File Types (PSD/TIFF): If you prefer to work with layered or uncompressed files for further editing or high-quality output, you can export images as PSD (Photoshop Document) or TIFF (Tagged Image File Format).
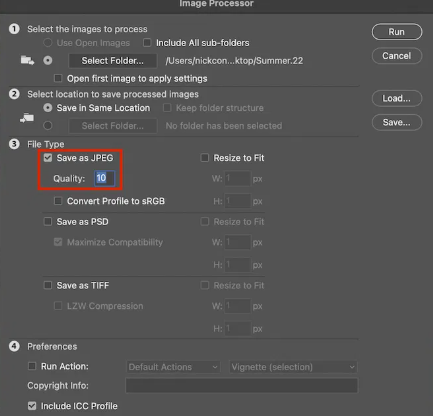
This process helps you tailor image resizing according to your specific needs, whether it’s for quick resizing or precise control over the final output.
Advanced Tips for Batch Resizing in Photoshop
While the above steps provide a basic framework for batch resizing, there are some advanced tips and settings that can help make your workflow more efficient:
1. Resize with Resampling
When resizing images, Photoshop offers the option to resample the images. Resampling changes the pixel dimensions, which can affect the image quality. Make sure to check the Resample option in the Image Size dialog box if you want to change the image’s resolution without affecting the physical size.
2. Use Presets for Consistency
If you regularly batch resize images for specific tasks (e.g., website images, social media posts), consider saving your resizing settings as a preset. This will save you time and ensure consistency across different batches.
3. Save Different Versions of Images
Photoshop’s batch processing allows you to save images in multiple formats with different settings. You can create separate actions for different tasks—like resizing for print, web, or social media—and automate the output accordingly. This is particularly useful for photographers or designers who need to deliver different versions of the same image.
4. Use File Naming Conventions
When resizing images in bulk, it’s important to keep track of your files. Photoshop allows you to add custom file names when saving resized images in the Batch dialog box. For instance, you can add a suffix like “_resized” or a date to ensure that you don’t overwrite the original files.
Common Issues When Batch Resizing in Photoshop
Although Photoshop’s batch resizing tool is highly effective, there are a few common issues that users may encounter:
1. Image Quality Loss
When resizing images, especially downsampling, there may be a loss of detail or quality. This is particularly noticeable when reducing image dimensions drastically. To minimize quality loss, always ensure that the Resample option is enabled and use the best interpolation method (like Bicubic Sharper) for resizing.
2. Inconsistent Results
Batch resizing may sometimes yield inconsistent results if the original images vary significantly in size, aspect ratio, or resolution. In such cases, consider adjusting the settings for each image or manually processing particularly large or unusual images.
3. File Size Issues
While resizing images, particularly for the web, you might face issues with file size. If you need to keep the file size under a certain limit, consider adjusting the image’s quality settings when saving.
Batch resizing in Photoshop is an invaluable tool for anyone who needs to process large numbers of images quickly and efficiently. By utilizing the power of Photoshop’s Actions and Batch processing tools, you can resize your images in bulk without sacrificing quality or wasting time. Whether you’re preparing images for print, web, or social media, mastering batch resizing is a great way to streamline your workflow and improve productivity.
Leave a Reply