Remote desktop connections have become increasingly essential in today’s digital workspace, allowing users to access and control computers from different locations. One crucial aspect of remote desktop usage is optimizing display settings to ensure a seamless and efficient user experience. In this review, we will explore how to adjust display settings in Remote Desktop Connection (RDC) and examine how AnyViewer, a popular remote desktop tool, facilitates this process.
Remote Desktop Connection (RDC) is a built-in feature in Windows that allows users to connect to another computer over a network or the internet. It’s particularly useful for IT support, remote work, and accessing files and applications on a different machine. To get the most out of RDC, adjusting the display settings is essential to ensure the best visual experience and performance.
Adjusting display settings in RDC can significantly impact your experience. Proper display configuration can enhance clarity, improve performance, and make the remote session more comfortable. Key settings include screen resolution, color depth, and display size, which affect how content appears on the remote machine.
1. Launch Remote Desktop Connection

To start, open the Remote Desktop Connection application on your Windows computer. You can do this by searching for “Remote Desktop Connection” or “mstsc” in the Start menu search bar.
2. Configure Display Settings
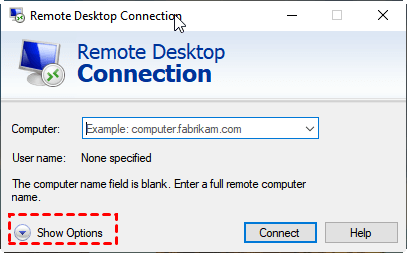
Before connecting, click on the “Show Options” button to expand the settings menu. Navigate to the “Display” tab, where you’ll find several options to customize:
- Display Configuration: Use the slider under “Display configuration” to adjust the size of the remote desktop window. You can choose to fit the remote desktop to your local screen or set it to a specific resolution.
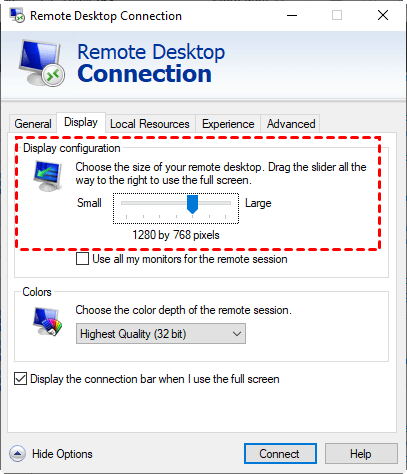
- Screen Size: You can select the “Use all my monitors for the remote session” option if you have multiple monitors and wish to extend the remote session across all screens. This option allows for a more immersive experience and better multitasking.
- Color Depth: Although this is less commonly adjusted, you can change the color depth to balance between visual quality and performance. Lower color depths can improve performance on slower connections.
3. Save Settings and Connect
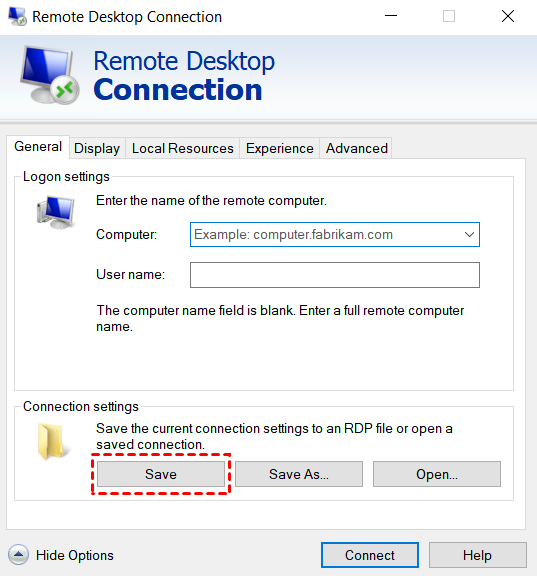
Back to “General” tab, and click “Save” to refresh the settings. Once you’ve configured your display settings, click on the “Connect” button to initiate the remote session. The adjustments you made will be applied, enhancing your remote desktop experience.
Adjust Display Settings in AnyViewer
AnyViewer is a versatile remote desktop tool that offers robust features for adjusting display settings. Its user-friendly interface and powerful capabilities make it an excellent alternative to the native Remote Desktop Connection.
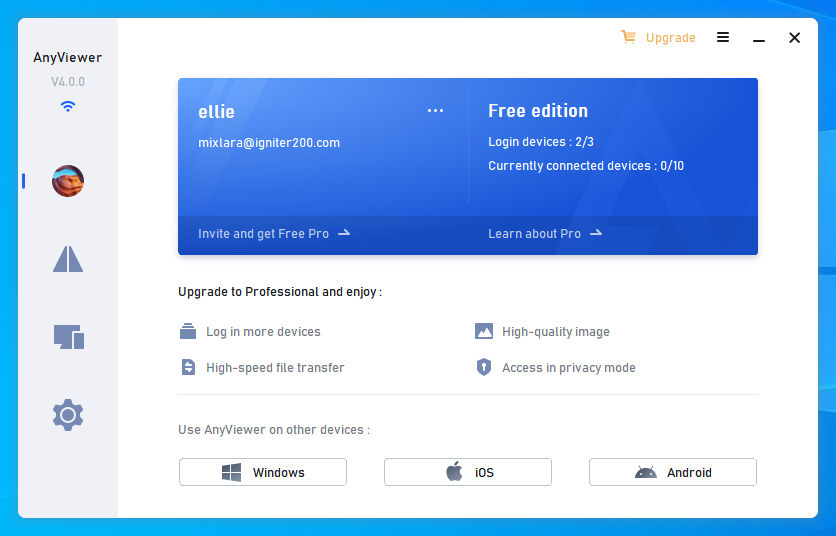
1. Download and Install AnyViewer
Download and install AnyViewer from the official website. After installation, open the application and sign in or create an account if required. On the host computer, go to Log in on the left pane, and click Sign up. Fill in the required information.

2. Connect to the Remote Computer
To start a remote session, enter the ID or address of the remote computer and connect. On the client computer, log in to the same account, and here you can also see the assigned devices.
3. Connect to the Devices
Go to Device, click the computer you want to connect to and click One-click control to perform unattended remote control.

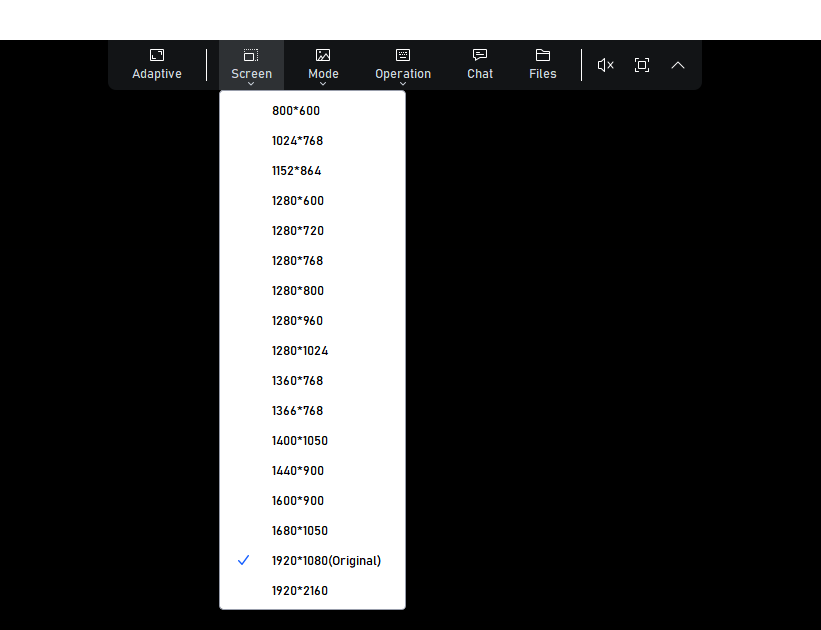
4. Adjust Screen Settings
Now that you can see and control the remote computer as if you were physically present, head to the upper toolbar and select the “Screen” option. Here, you have the ability to adjust the screen resolution. If you’re unsure of the exact resolution, simply choose the “Adaptive” option to automatically adjust the remote desktop so it fits your screen perfectly.
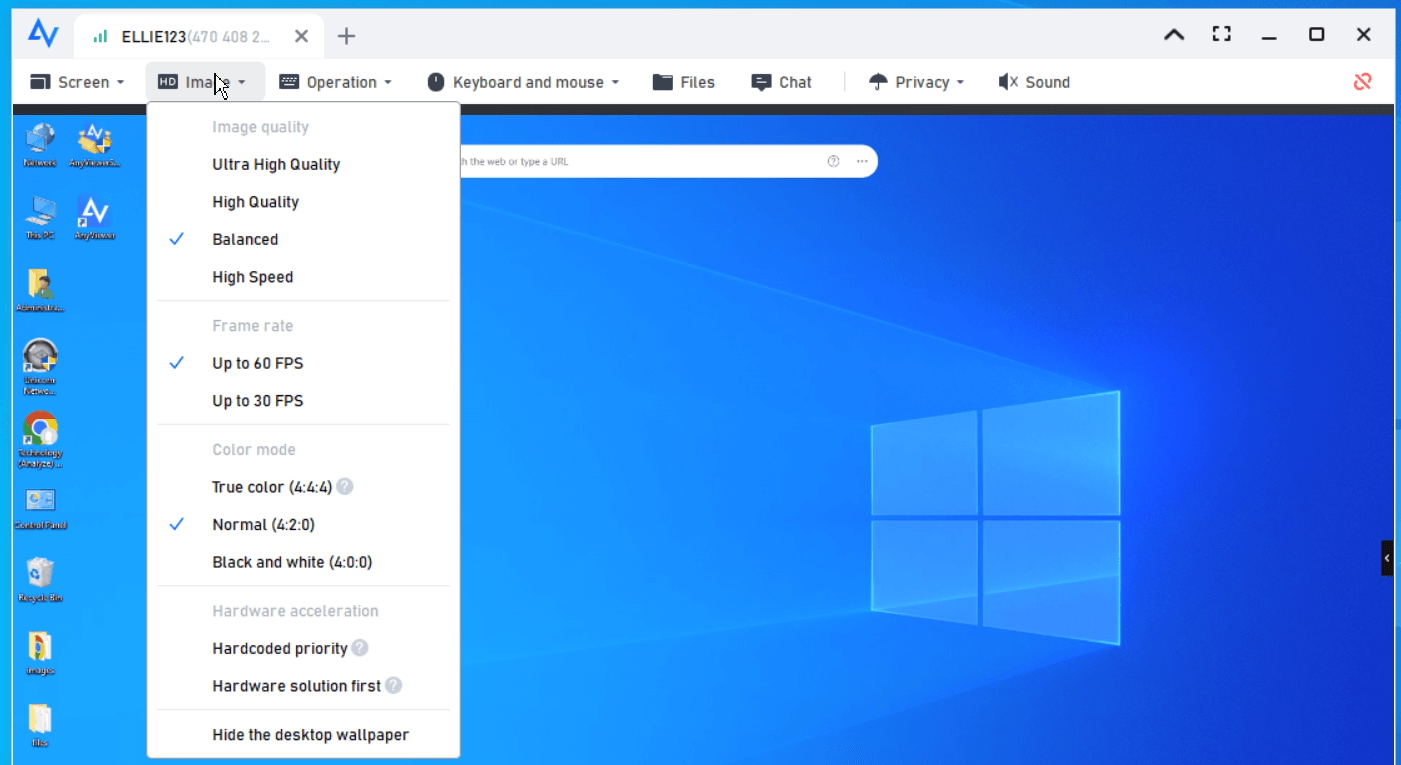
5. Adjust Image Quality
You can also adjust the image quality by clicking on the “Mode” option, allowing you to adapt it in real time based on your network conditions.
6. Benefits of Using AnyViewer
- Enhanced Flexibility: AnyViewer offers greater flexibility in display settings compared to RDC. Its intuitive interface and additional options make it easier to customize your remote desktop experience.
- Improved Performance: With AnyViewer, you can fine-tune settings to optimize performance based on your network speed and hardware capabilities. This ensures smoother operation and reduced lag during remote sessions.
- Multi-Monitor Support: AnyViewer’s support for multiple monitors allows users to manage complex workflows more effectively. You can extend your remote session across several screens or switch between them as needed.
- User-Friendly Interface:The straightforward design of AnyViewer’s display settings interface makes it accessible even for users who are new to remote desktop tools. Clear options and easy-to-use controls simplify the process of adjusting settings.
Adjusting display settings in Remote Desktop Connection is crucial for optimizing your remote desktop experience, ensuring that you have the best visual clarity and performance. By configuring settings such as screen resolution, color depth, and display size, you can enhance your productivity and comfort during remote sessions.
AnyViewer offers an excellent alternative to RDC, with additional features and greater flexibility in display settings. Its user-friendly interface and advanced options make it a valuable tool for those who require more customization and control over their remote desktop experience.
Whether you choose to use the built-in RDC or opt for AnyViewer, understanding and adjusting display settings is essential for making the most out of your remote desktop sessions. By following the steps outlined in this review, you can ensure a smoother and more efficient remote desktop experience tailored to your needs.
Leave a Reply