Setting up programs to run at startup in Windows is a straightforward process that offers significant convenience for both everyday and professional users. With the right startup configurations, essential programs like email clients, productivity tools, or system optimizers can automatically launch each time you start your computer, saving time and effort. Here, we’ll explore several methods for adding programs to startup in Windows, including manual approaches, utilizing the Startup folder, and leveraging software like Glary Utilities’ Startup Manager for more refined control.
- Use the Windows Startup Folder
If you want to add a program to Startup in Windows, you need to open the Windows Startup folder in the first place. Startup is a hidden system folder in Windows. There are two ways to open the Startup folder: Use File Explorer, and Use the Shell Command.
Use File Explorer
To open Startup folder in Windows with File Explorer, you can follow these steps.
- Press Win + E to open File Explorer.
2. Click View tab, and then check Hidden items to show hidden folder.
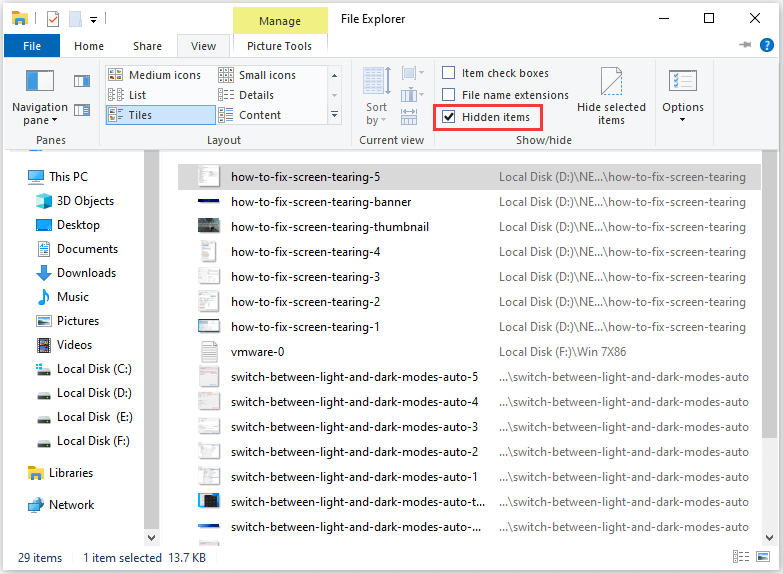
3. Copy and paste the following path to the address bar: %APPDATA%MicrosoftWindowsStart MenuProgramsStartup.
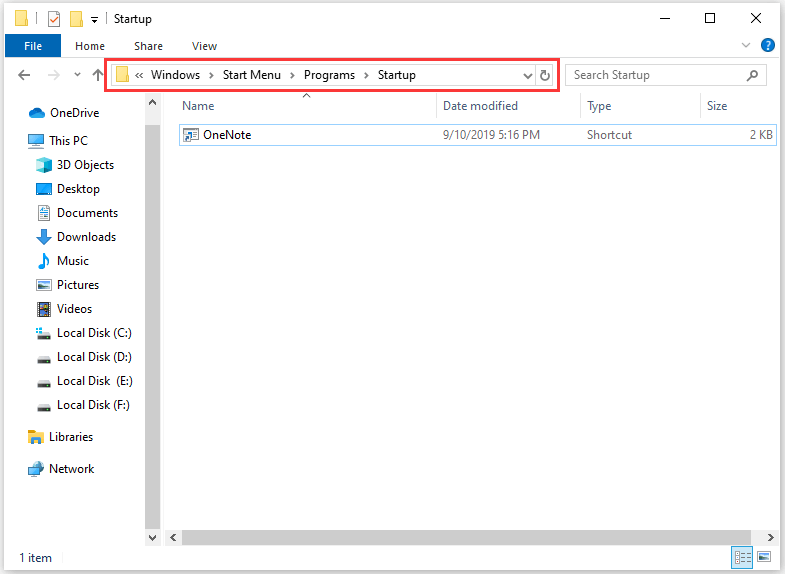
Besides File Explorer, you can open Startup folder with the shell command. Here’s how to do it.
- Press Win + R to open Run window.
2. Input shell:startup in the box and then click OK to navigate to the same path %APPDATA%MicrosoftWindowsStart MenuProgramsStartup quickly.
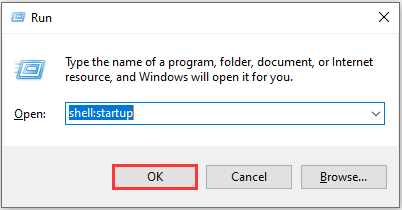
Then Startup folder will be open and you can continue to add a program to startup in Windows.
Tip: You need to keep the Startup folder open because it will be used in the next move.
This approach works best for lightweight applications that won’t slow down your startup too much. If you find your system slowing down, consider removing nonessential programs from this folder.
2. Use Third-Party Tools like Glary Utilities’ Startup Manager
Managing startup programs manually can become overwhelming, especially if you have many applications. Glary Utilities is a well-regarded system maintenance suite that offers a powerful Startup Manager tool. This feature simplifies managing, adding, or removing startup programs, making it ideal for users who want to optimize their system without digging into multiple settings.
Glary Utilities’ Startup Manager provides a user-friendly interface that allows you to control startup programs efficiently. With it, you can see detailed descriptions of each program’s impact on system performance, enabling you to make informed decisions about which programs to enable or disable. This tool is particularly helpful for those who may not feel comfortable making manual changes or using the Registry Editor.
- Download and install Glary Utilities from the official website if you haven’t done so already. Launch the program, and navigate to the Startup Manager from the main menu.

2. Locate the “Add program” feature within the Startup Manager and click on it to proceed.
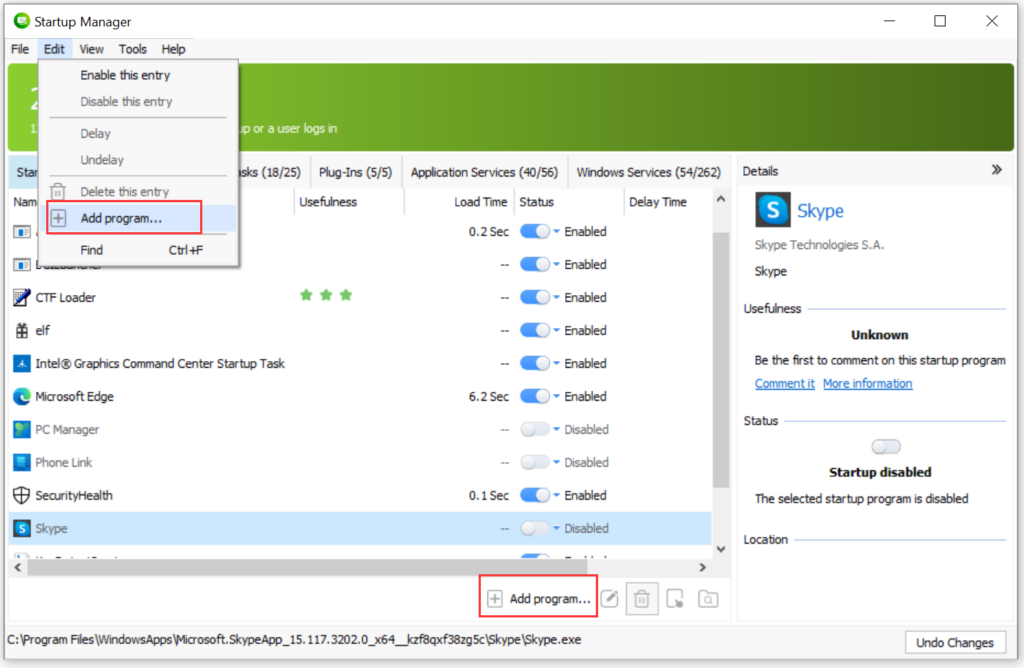
- Enter the program name, directory path, and customize startup delay time to your preference.
- Confirm your selections and click “OK” to add the program to startup.
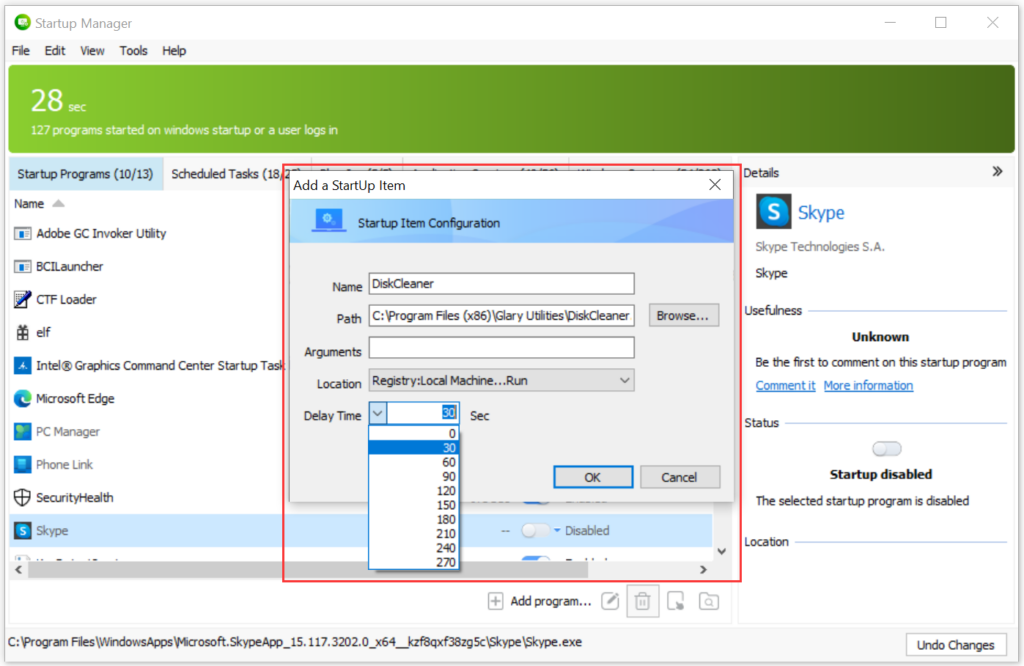
By following these steps with the “Add a Startup Item” feature in Glary Utilities’ Startup Manager, you can effortlessly add programs to startup and optimize your computer’s boot process.
Adding and managing startup programs in Windows is an important part of optimizing your PC’s performance. By following these methods, particularly with the help of tools like Glary Utilities’ Startup Manager, you can make sure that your system launches only essential applications—helping to achieve a smoother and faster startup. Whether you prefer manual setup or a third-party solution, the right configuration can make a substantial difference in your Windows experience.

Leave a Reply